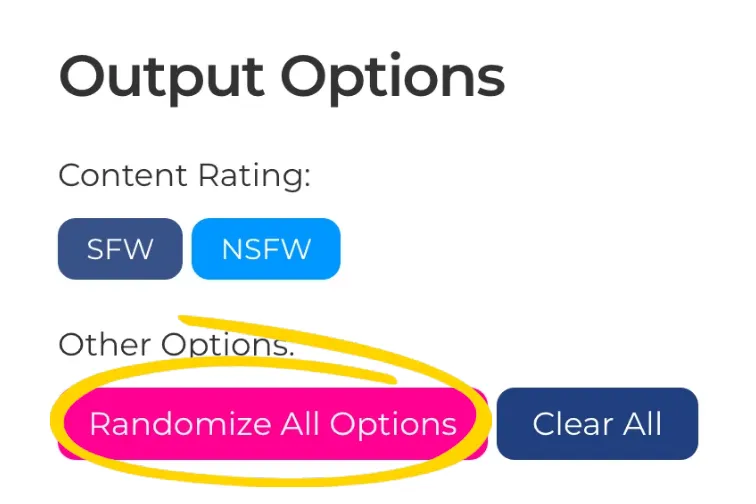
This button applies to all sections. When “Active”; each time you press “BUILD AI MODEL” it will randomize every single section.
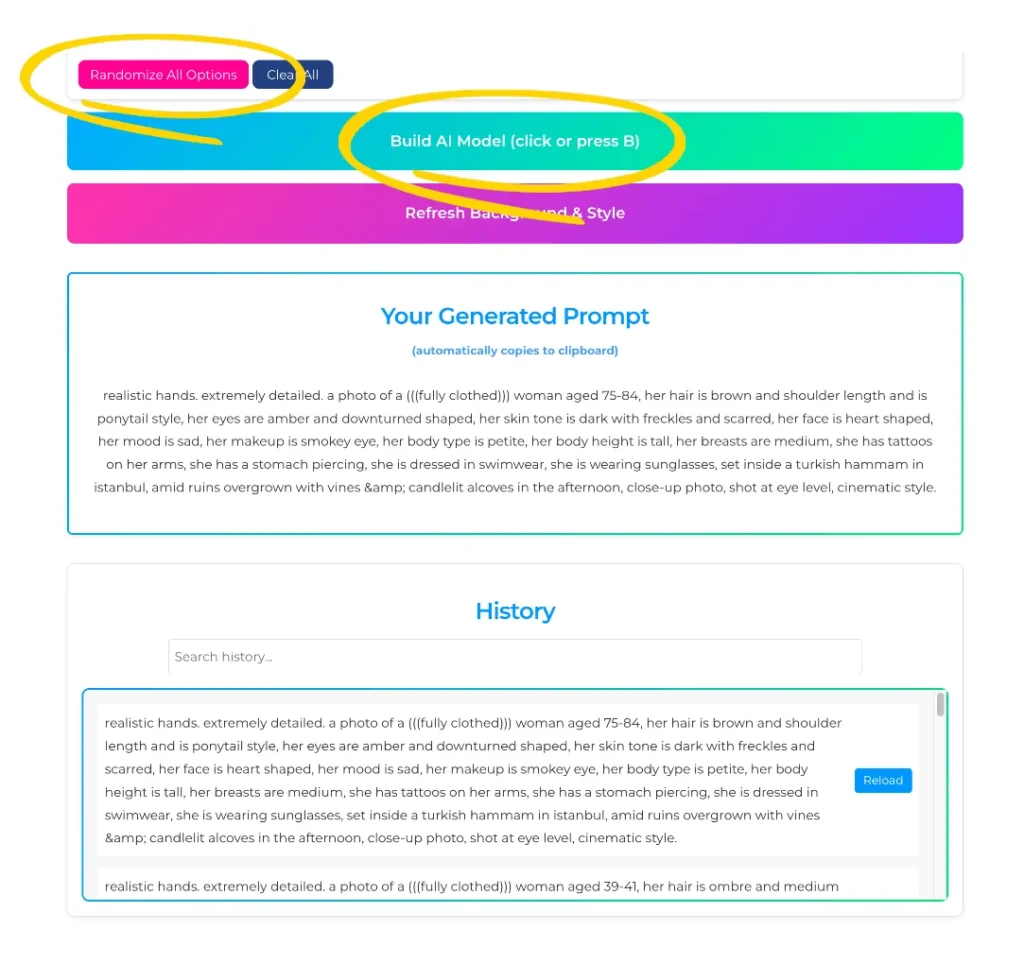
Click 'Randomize All Options'
Click "Build AI Model"
Prompt is Automatically Copied To Clipboard
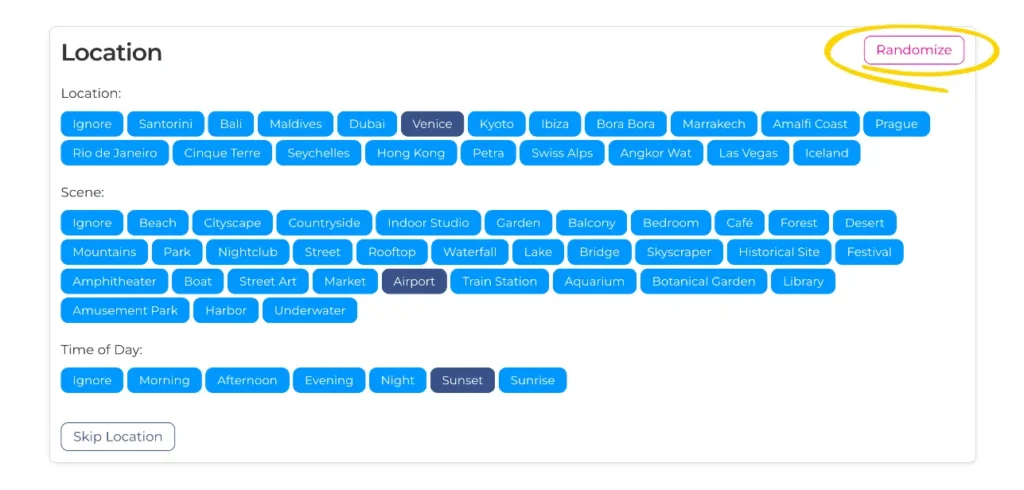
Randomize Sections
This button applies to individual sections. Each time you press Randomize button for a section it will automatically randomize that section only.
Click 'Randomize' for Desired Section
Click "Build AI Model"
Prompt is Automatically Copied To Clipboard
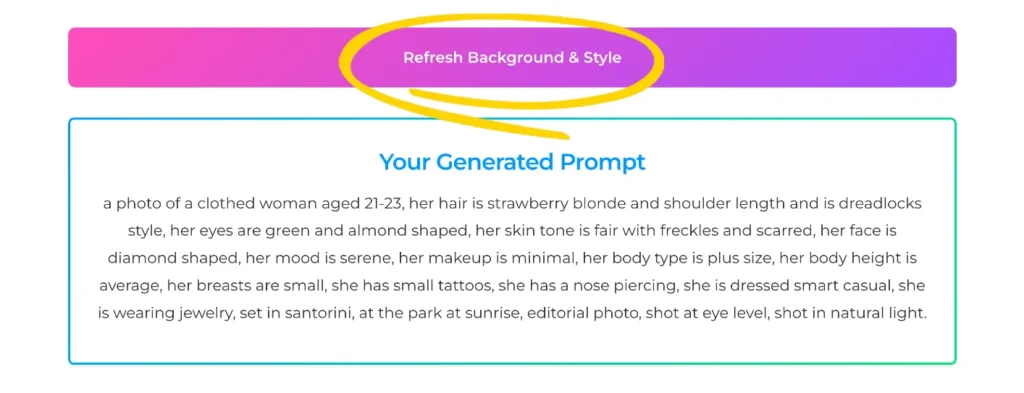
Refresh Background & Style
This button refreshes the influencers background and clothing, while keep the details of the face the same. This is what you would use to generate unlimited amounts of images of the same model.
Clear All
This button clears the page of any selections. Make sure you saved your influencer if you are happy with her (see below) before clicking this, or all your selections will erase.
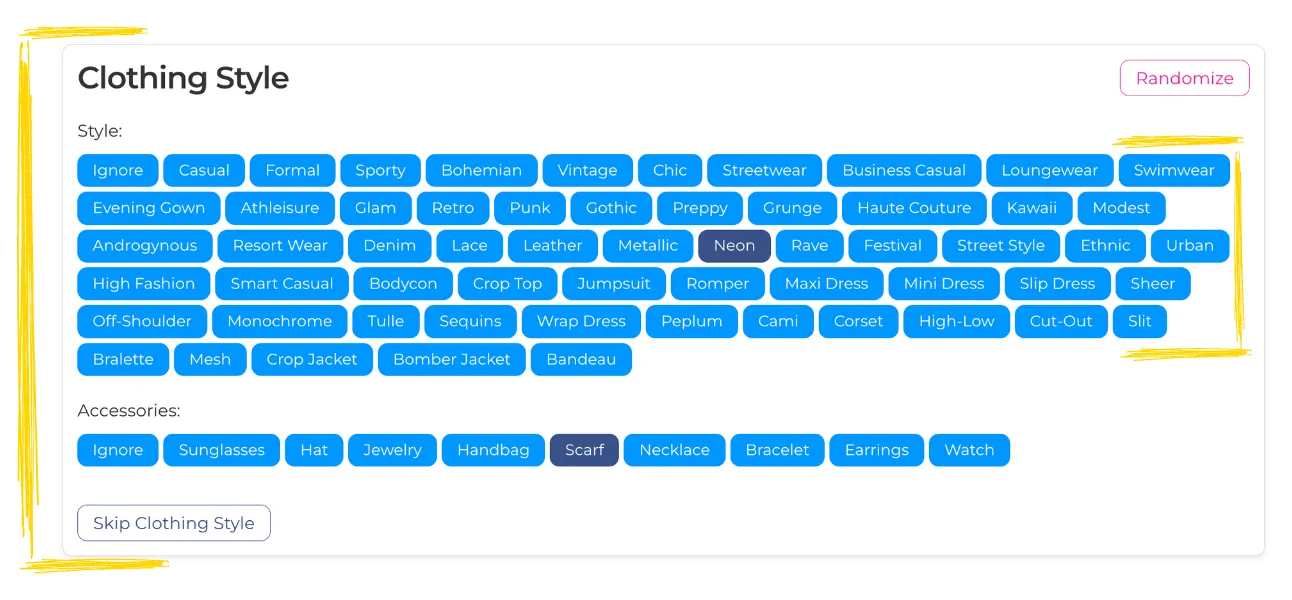
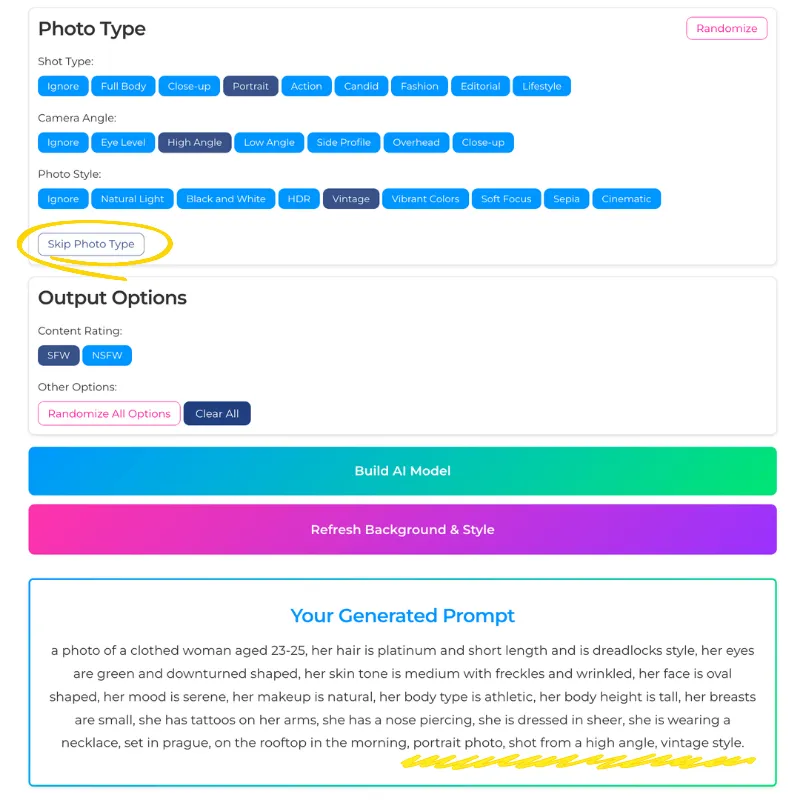
Skip Sections
If you want to skip a full section in the prompt, click on Skip button for any of the sections and it unselects all options as well as keeps it disabled for future prompts. Then just click Build AI Model again and it will generate that same prompt, but without that section.
Note: Make sure Randomize button is not activated or else the whole prompt will change – still keeping that section skipped though.
Skip Features
If you want to skip a feature of a section in the prompt, click on Ignore button for that feature and it unselects all options as well as keeps it disabled for future prompts. Then just click Build AI Model again and it will generate that same prompt, but without that feature.
Note: Make sure Randomize button is not activated or else the whole prompt will change – still keeping that section skipped though.
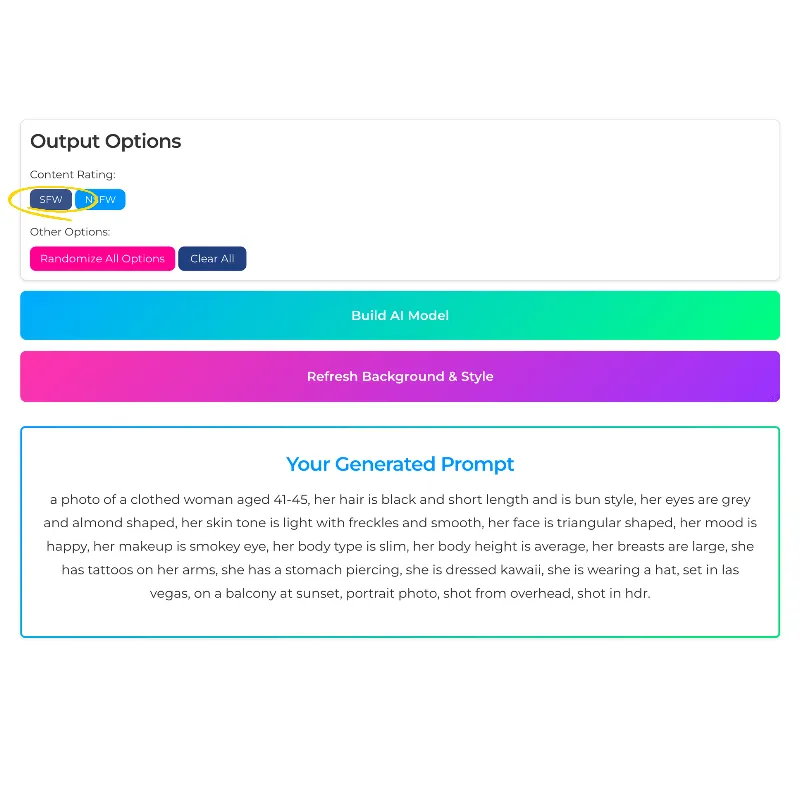
SFW (Safe For Work)
It keeps the generated prompt PG, making sure the model is fully clothed. More suitable for Instagram, Threads and Twitter. Keep in mind sometimes the AI Image Model might randomly generate nude photos at times, this is not always 100% controllable.
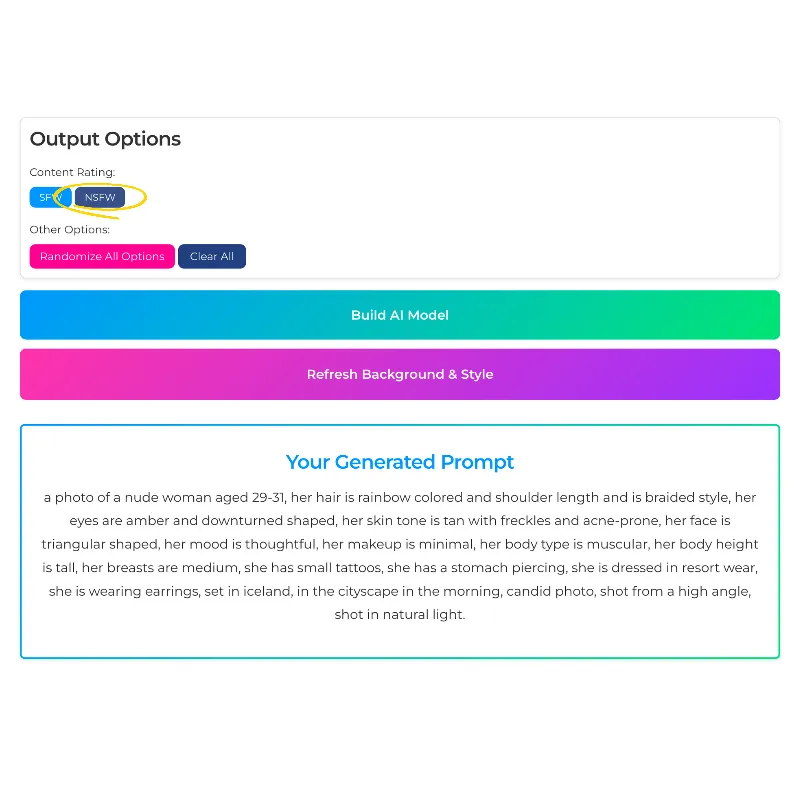
NSFW (Not Safe For Work)
It keeps the generated prompt X-Rated, making sure the model is fully nude. More suitable for OnlyFans and other Premium Membership sites. Keep in mind sometimes the AI Image Model might randomly generate fully clothed photos at times, this is not always 100% controllable.
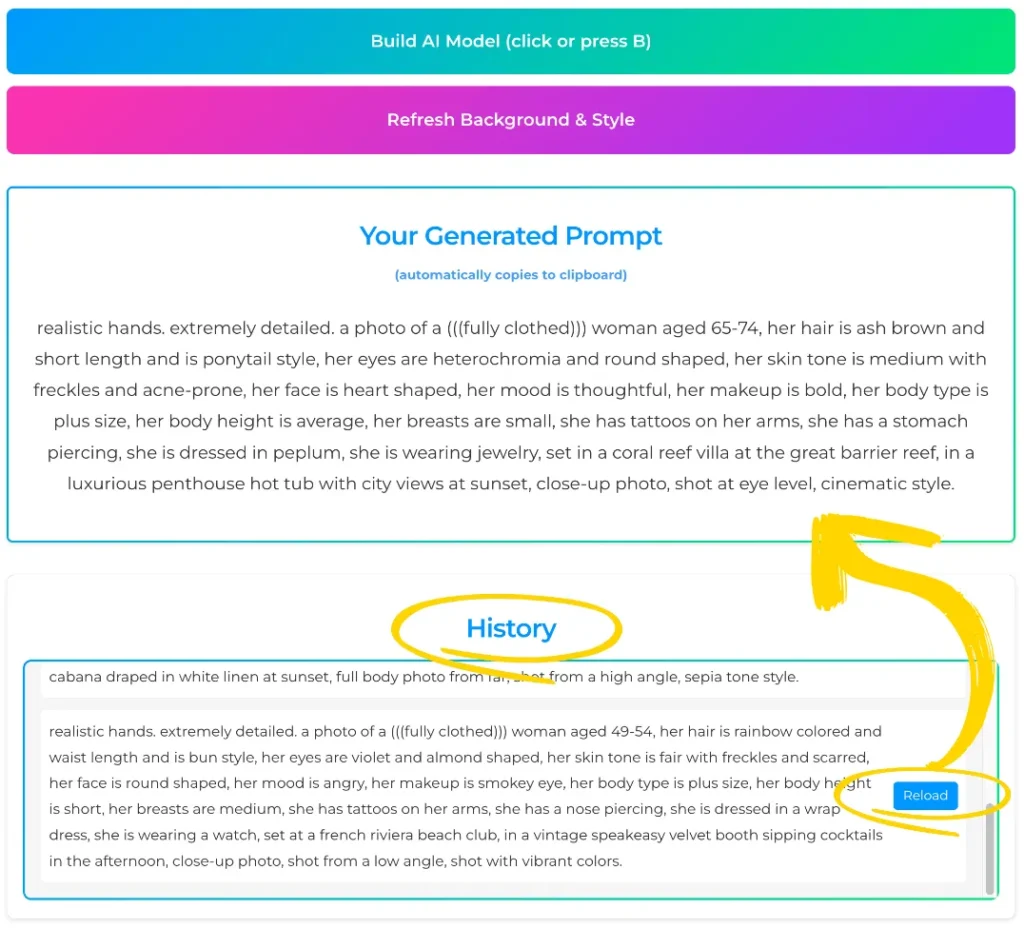
History
Each time you click on “Build AI Model”, the generated prompt will be saved to your History box below where you can come back to it and reload the options again so you can refresh her background.
This is designed for you to quickly generate dozens of models, go to your AI image tool to create them, and then, based on the ones you like, come back here and reload it to save her.
Note: If you “Clear” or refresh the page, all history will be deleted.
Creating & Saving Models
Create Model
When you are satisfied with your generated model, the best move is to save her prompt for future use. Follow the steps below to easily do this.
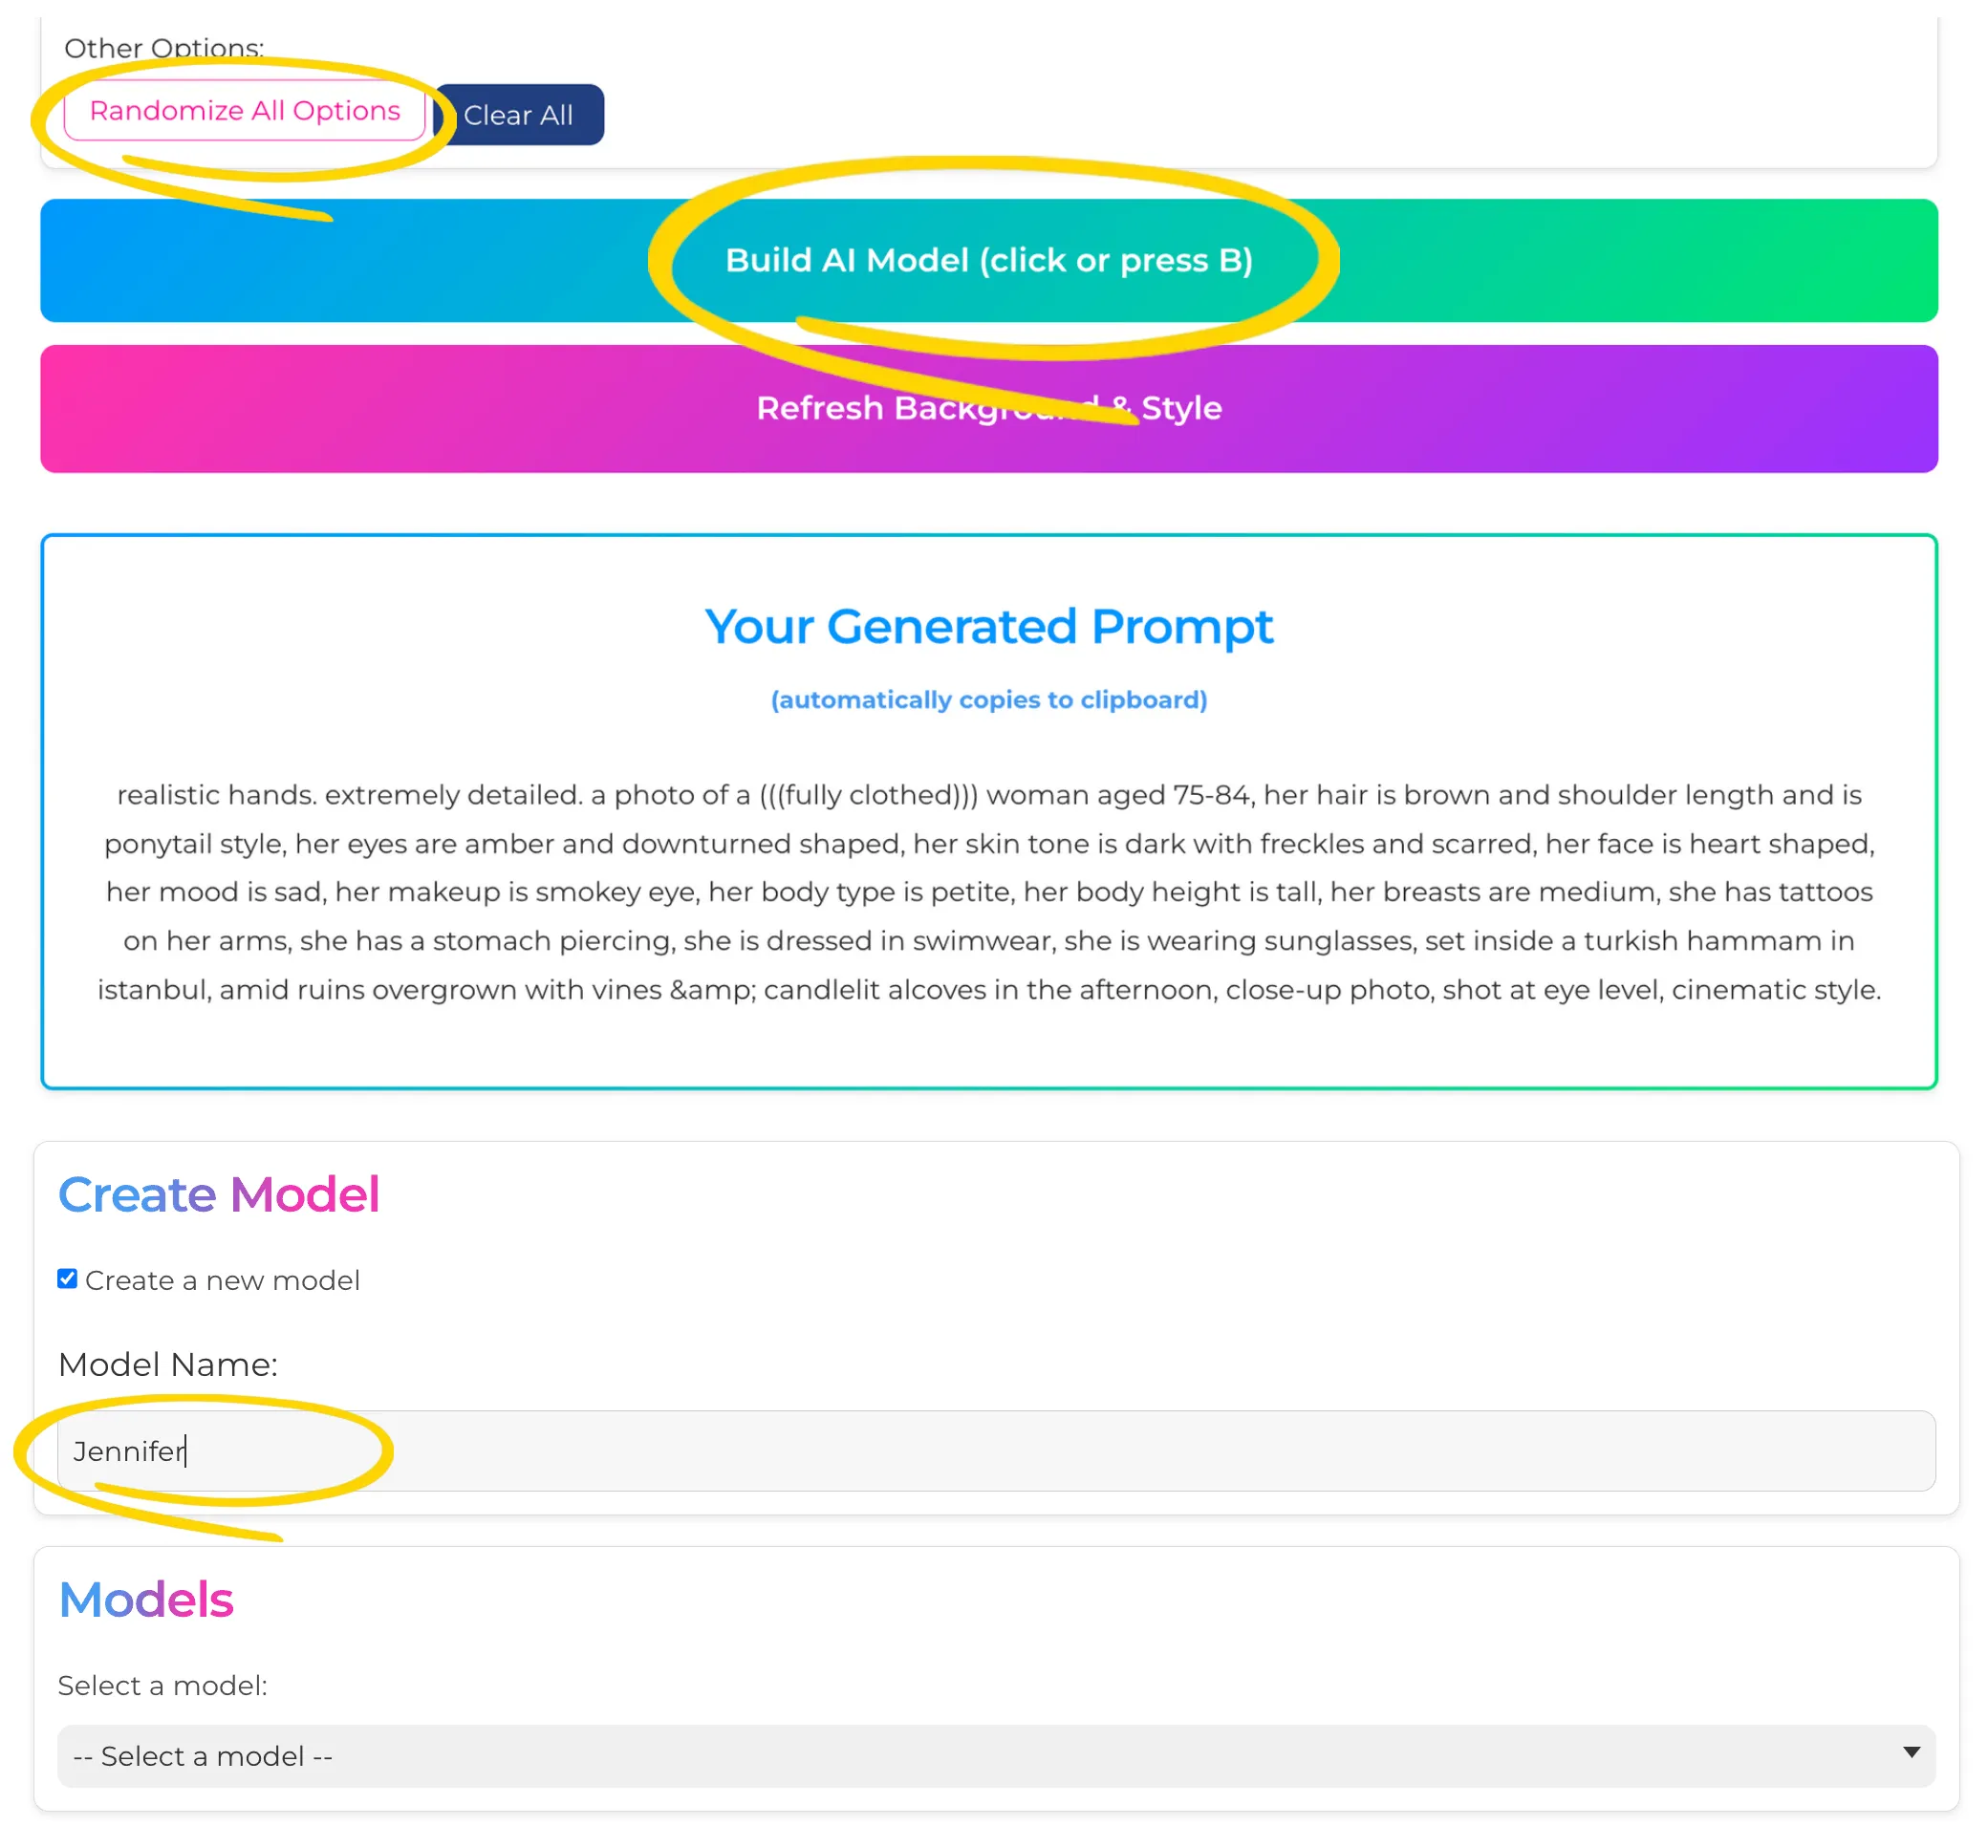
Click the "Create a new model" checkbox
Give your model a name
IMPORTANT: Make sure "Randomize All Options" button is NOT active or else when following the next step, it will completely change your amazing prompt
Click "Build AI Model" and it will now save your model
NOTE: To continue Generating More prompts for your saved model, select your new model from the dropdown list because by default it selects none after creating it
Selecting Saved Models
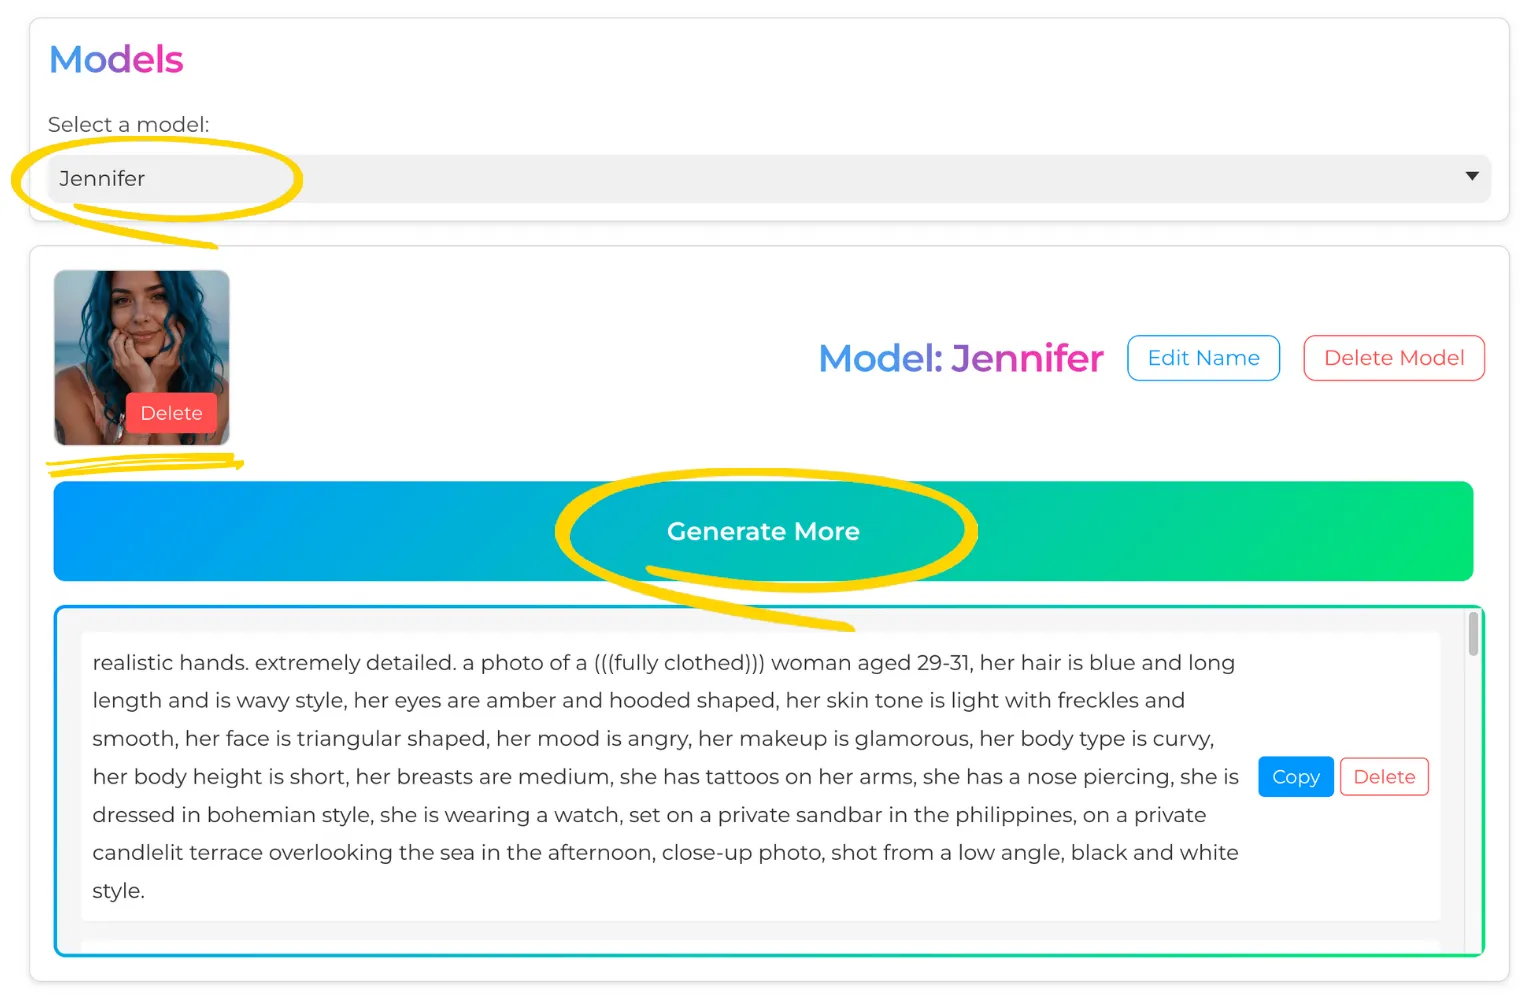
In the Models box, you can select any of your saved model. There is no limit to how many models you can create.
NOTE: To continue Generating More prompts for your saved model, select your new model from the dropdown list because by default it selects none after creating it
Generate More
Once your model is saved, you can now generate thousands of new prompts with new backgrounds and clothes.
Each time you click "Generate More" the prompt is saved in your history below and is automatically saved to clipboard
More Model Functions
For each model you can do the following:
Upload / Delete Profile Picture - (Try and minimize the file size of the image before uploading)
Edit Name or Delete Model
Copy Old Prompt or Delete from History
NOTE: Each time you rename your model, refresh the whole page and select your model again from the drop down.
Creating The Perfect Model:
Step 1 - Randomize All Options
The goal here is to generate dozens of models to find the perfect fit.
1: Activate "Randomize All Options"
2: Click "Build AI Model" or press "B" on your keyboard
NOTE: Don't refresh or clear the page or else all your history will erase.
Step 2 - Generate
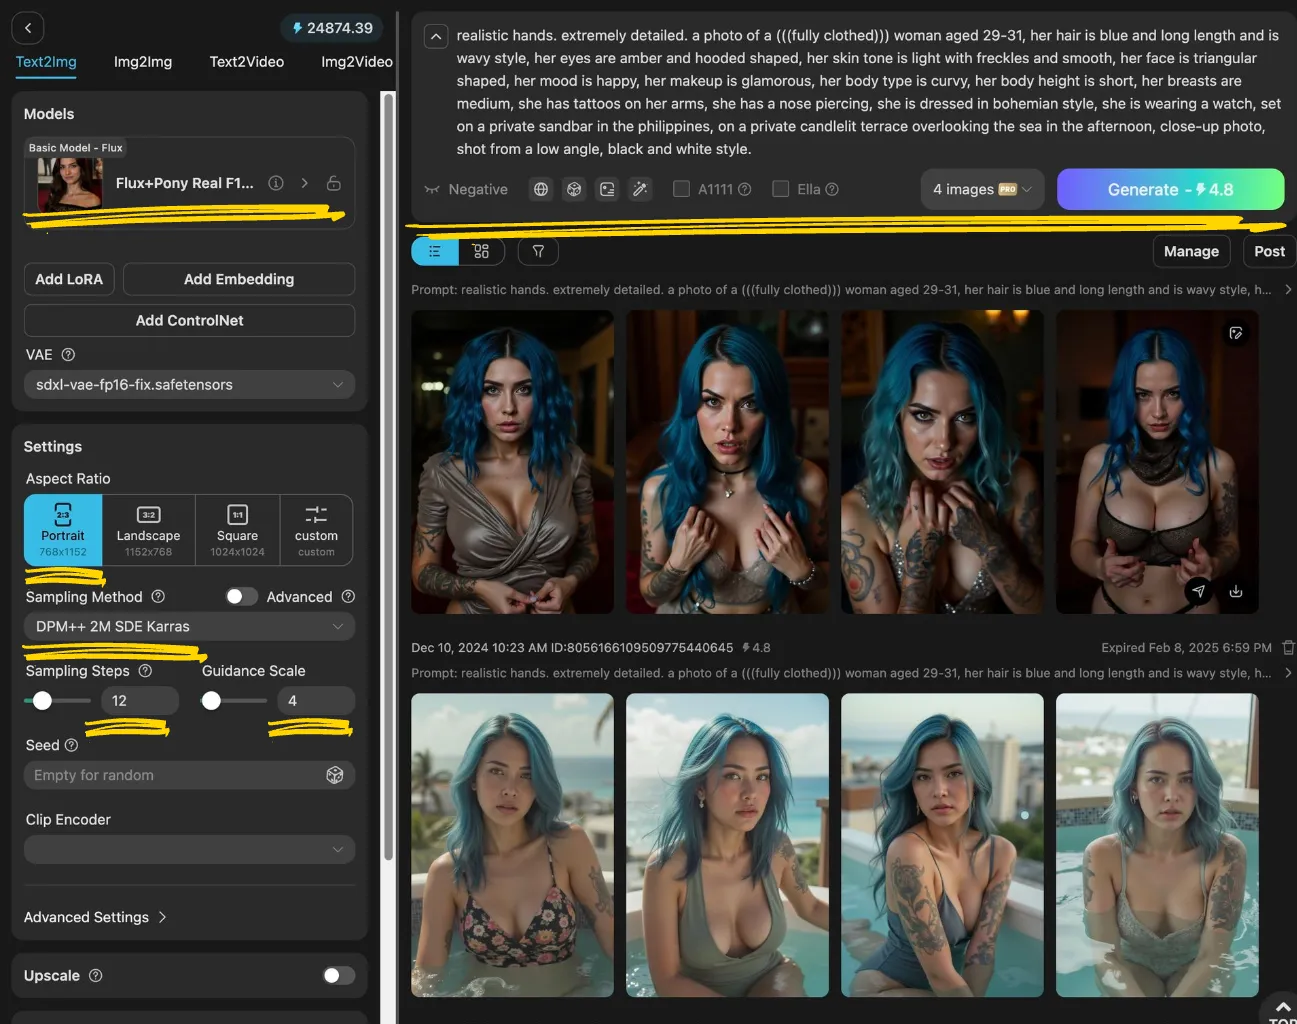
Each time you randomize your model, take the copied prompt to an image generator of your choice and generate multiple images of that prompt. Once you are happy with a set of images, then that’s your model! Below are the settings I used for Tensor.art
Model: Flux+Pony Real F1D - alpha
Aspect Ratio: Portrait
Sampling Method: DPM++ 2M SDE Karras
Sampling Steps / Guidance Scale: 12 / 4
Quantity: Generate 4 images at once
Step 3 - Refresh Background & Style
From your image generating tool decide what model you’re happy with and copy that prompt or a phrase of it. Then:
1: Head to the InfluPrompt History section
2: Search for your prompt generated by pasting your prompt or searching for that phrase
3: Click "Reload" so it reloads that prompt
Step 4 - Create Model
Once you Reloaded the prompt:
1: Make sure "Randomize All Options" button is unchecked
2: Click the checkbox: "Create a new model"
3: Give your new model a name
4: Click "Build AI Model" - now your model is saved.
Step 5 - Generate More
Once your model is saved, you can now generate thousands of new prompts with new backgrounds and clothes.
1: Generate as many as you want and start creating your content
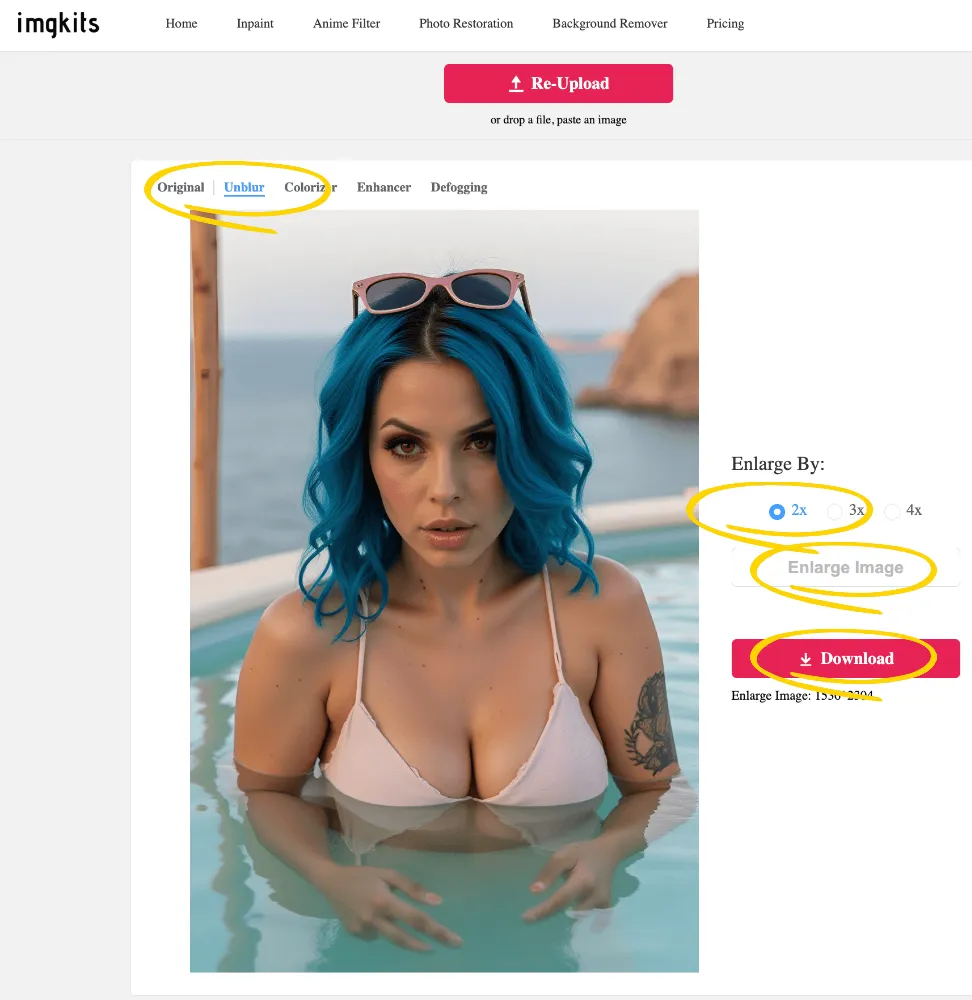
Step 6 - Upscale
Once you select an image you’re happy with, head to imgkits (or any other upscaler you want) and upscale your image by at least 2X.
I used imgkits.com since it’s the cheapest upscaler I found out there. It’s currently only $27 for lifetime access from AppSumo and allows you to upscale an unlimited amount if images per month (including other features as well).
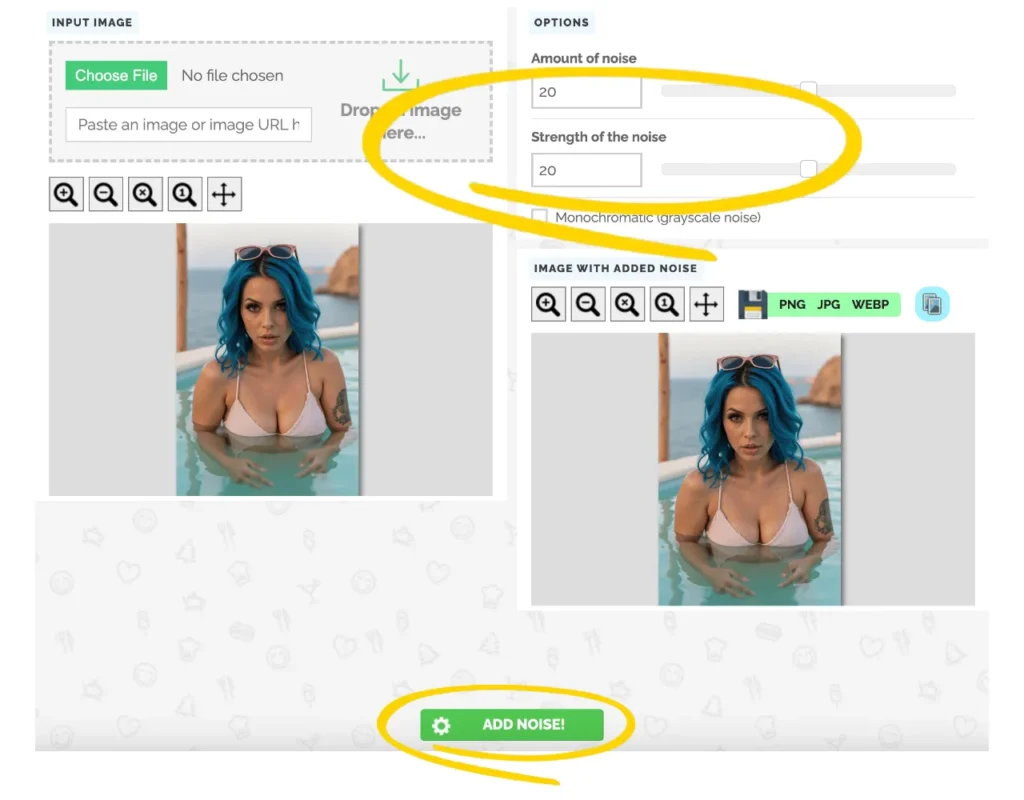
Step 7 - Add Noise
Adding noise / grain creates a “real” feel to your image and doesn’t make it look so fake. Head to this Free tool to add noise to your images: PineTools.com
1: Upload your image
2: Amount of Noise: 20-35 / Strength of Noise: 20-35 (feel free to play around with it, but don't add too much)
3: Click "Add Noise"
4: Download PNG
Step 8 - Ready to Upload
Now you’re ready to start uploading and growing your influencer account.
Hint: Create multiple images at once, schedule everything and then continue making more models.
The Final Product:
Click image to view and download full quality, 6.8 mb
Clickable Image with Smooth Zoom and Subtle Shadow